About Me

Sunday, 13 December 2015

REVIEW: LORAC Pro Contour Palette & Brush

ITEM: LORAC Pro Contour Palette & Brush (U.S. Link and price HERE
PRICE: $86.99 (AUD - MYQT - Plus you can get free express shipping if you spend $100)

So there has been unlimited hype about this product - I would honestly say that it was the most raved about contour palette after Kat Von D Shade & Light (REVIEW HERE). So... I have been dying to get my hands on so that I can test, try, use, and review for everyone! (And judging from my instagram post, this was something everyone was waiting for anxiously).

I do apologise that it took so long - a lot of things got in the way of this (macbook breaking, assignments consecutively being due, being sick etc). I have also had so many technical issues with my camera.  BUT! I am getting it up now. I'm so sorry.


So for in depth thoughts and opinions on the product, please keep reading and enjoy!

Sunday, 27 September 2015

SWATCHES: Berry Lip Shades

So if you follow me on Instagram (which you should - @mnh.beauty), then you will know that lately I have been on a roll with swatches of makeup. There are two key types of swatches that I have been doing:
  • Similar shades in products across different brands (for dupes)
  • Similar shades in products within the same range (for choosing the shade you want)
This was because, before I started beauty blogging or Instagramming, I was always looking up swatches of products. That way, when I'm buying them, I'm not buying "similar shades", or because I was looking for a dupe. I often struggled to find them. I was always looking for swatches of all the Anastasia Beverly Hills products (because I wanted to purchase them and knew the online colour depictions were incorrect). However, my searches often were unsuccessful, or the colours I wanted were not side by side so it was hard for me to do an accurate comparison! 

This frustration led me to start doing these things on my own. For everyone's benefit!

I have them featured on my Instagram, but I decided to also make really quick and short blog posts with them on it. This way, you can just have access to them all on one website! (Click the Swatches tab for a compilation).

So the first I will do is the Berry lip shades!

Sunday, 20 September 2015

REVIEW: Too Faced Born This Way Foundation


ITEM: Too Faced Born This Way Foundation (U.S. link and price HERE) 
PRICE: $58AUD (Price at Mecca)

You knew I had to review this next.

The hype around this foundation was insane. Absolutely everybody not only tested the foundation, but LOVED it. This quickly became holy grail status for so many people, and all the Youtubers were putting this into their favourites. So when they launched this in Australia, I woke up at 6.30am and snagged two shades. (Yes, I got two because I did not know what shade I was in and I did not want to miss out on finding my perfect match).

I have now tested this out and am bringing you my opinions on the product!

Wednesday, 16 September 2015

QUICKIE: Ellis Faas Skin Veil Foundation

ITEM: Ellis Faas Skin Veil Foundation (U.S. link HERE)  
AUS PRICE: $110AUD (Bottle); $76AUD (Pen) - prices from Mecca 
U.S. PRICE: $90USD (Bottle) $65USD (Pen)


Recently, I was asked by someone if I knew a good “full coverage but dewy finish foundation”. Sadly, I couldn’t say yes. The reality being that most full coverage foundations are matte finishes, and most dewy foundations are light or at best, medium coverage. I was determined however, to find a full coverage dewy foundation. I mean, I have dry skin, love full coverage, and love a dewy finish, so it was a win-win situation.


I went onto www.mecca.com.au and went through all the foundations to find one that I didn’t already have, but had positive reviews. Then, I came across this baby. Now, I have been using this for over a month (and I’m not going to lie, it’s the only foundation I have used in that period because of how much I love it). So this post will tell you all the details in a quick and succinct manner, the pros and cons of the foundation.

Thursday, 10 September 2015

TOP 5: Makeup Tricks & Hacks

So I decided to do a post that's a little bit different today. I have decided to share with everyone my top 5 makeup tricks and hacks! You may already know some and some may be new to you. I just hope that it's helpful for as many as possible. Let me know any of your makeup tricks or hacks! I love to read about the little things that you can do that make such a big difference in makeup routines. ENJOY!


P.S. Please excuse the messy brows in these pictures. I am currently growing them out to reshape them ;)

1. Master the Winged Liner

I have done a winged eyeliner look since... as far as I can remember. Over the years, I have experimented with different ways to perfect the wing and if there is something that I am confident about in my personal makeup, it's my ability to perfect my winged liner.

One trick that I love to do, particularly when I have messed up my wing, or I'm in a rush to complete it is to use a pointed & flat Q-tip/cotton bud. My favourite one is the Swisspers Dual Cosmetic Cotton Tips (link provided).

The unique shape of this (with one pointy end and one flat end) makes it perfect for fixing up a wing.

How to use:
1. Draw on your wing. This can be messy or not as perfect. You don't need that perfect flick because that's the point of the Cotton Tip. You also don't need both wings to be identical (yet).

2. Squeeze out a tiny bit of moisturiser or eye cream or concealer onto the back of your hand and gently roll the pointy side of the Cotton Tip into the product to get a thin smooth layer onto the Cotton Tip.

3. Roll the pointy tip along the bottom of the wing to perfection!

4. If you have any faded lines of eyeliner drawn across your face/temples, use the flat side of the Cotton Tip to just wipe it away and pat that area with your finger to blend any residue out.

Then, VOILA! You should have a perfected pointed wing!

2. Creaseless Concealer

One of the biggest issues that girls have with makeup is that their concealer creases. I cannot deny that I struggle with that issue too. There is only so much that good quality products can do when you have a bunch of fine lines (plus dry skin). So the following are a few tips to remember to minimise (not necessarily eliminate) the creasing of your concealer.

A) Pat both ways
When you're blending in your concealer, a lot of people tend to only blend outwards toward your temples. But you need to make sure that you're blending inwards towards the bridge of nose and outwards towards your temples. I always make sure that my last action is to bring the concealer inwards. This really helps to have a beautiful creaseless application of the concealer at first instance.

B) Look up
When you're patting in the concealer, tuck your head down and look up into a mirror. This will smooth out the lines when you're blending in the concealer and prevent it from creasing and settling into the lines underneath your eyes.

C) Powder immediately
Keeping your head down, make sure that you powder immediately after you have finished patting in the concealer.This will make sure that the concealer stays in place and does not settle into the lines. When doing so, don't apply too much powder because I personally found that too much powder leads to the powder itself settling into the lines.

D) Keep it hydrated
Being a girl with dry skin, my under-eyes are inevitably very dry. This exacerbates the creasing of concealer underneath my eyes. Therefore, I feel that keeping that area hydrated is of utmost importance. You can do this by using eye-cream, blending in your concealer with a damp beauty blender, using little powder, using a setting spray after powdering, and opting for a liquid rather than a thick dry creamy product. 

3. Long-lasting Lipcolour (without using a stain)

One annoyance I find with lipsticks is having to re-apply, and having to be conscious of the fact that the colour will wear off during the day. That's why my lazy side has prevailed and I've opted for liquid lipsticks or lip-stains that will not come off. However, I have been fortunate and discovered one technique that extends the longevity of my lipstick.

What to do:
1. Apply your lipstick as per normal.
2. Gently kiss excess onto a piece of tissue.
I forgot to get a shot of putting the tissue on my mouth ;)
3. Apply another coat of lipstick and gently kiss the excess onto a piece of tissue.
Not trying to be Asian ;) just indicating 2nd application ;) 
4. Grab another piece of tissue and separate it into a very thin ply of tissue.
5. Place this over your lips and grab some translucent or colourless face powder.
6. Pat some powder onto the tissue that is on your lips.

VOILA! You have long-lasting lipstick. (This does not mean it will last all day and night. However, it will prolong the wear of the lipstick).

4. All About that Base

If there is one thing I think is vital to flawless makeup, it's that your have a flawless base. So one simple, easy to understand tip is to spend that extra minute (or ten) on your base. Work on your skincare (my skincare routine posts are linked here and here), ensure a flawless foundation application by colour matching and blending well (my top 5 foundations post linked here), and make sure your contour, bronzer, blush and highlight aren't muddy or harsh. With a flawless base, any eye look or statement lip will pop and look stunning.

I know this is a simple and 'stupid' tip to many but I really do think it makes a significant difference in your makeup. When my skin is irritated, or flushed, or my base just went on muddy, my perfectly blended eye look begins to look muddy and unattractive (no matter how hard I try to make the eye look perfect). So if you're running short on time and want a stunning makeup look, I recommend a simple eye, perfected base makeup, and a statement lip!


BEFORE
Only eye makeup (no mascara)
After
All makeup on (no falsies)
So obviously, a flawless base complexion makes you look much more done up and the makeup looks more complete.

5. Know Your Face

One strange thing I have told a lot of people who ask about makeup is know your face. Without knowing your face, you won't know what does and does not suit your face. Without knowing your face, you won't know what techniques do and don't work for your face. No matter how many pictures on Instagram you see, how many Youtube videos you watch, how many products you own, without knowing your own face, you won't know what will look best on you. It is recognising that different face shapes, eye shapes, lip sizes, nose sizes, brow shapes, forehead sizes, exist, and that you will need to adapt your make up accordingly.

The following are some things about my face which I have realised:
  • I have a very round face
  • I have high cheekbones
  • My forehead is a normal size
  • I have uneven eyebrows 
  • I have a lot of eyebrow hairs
  • I have normal sized lips
  • My left jawline is more chiselled and defined than my right
  • My nose is quite bulbous 
  • My eyes have different 'double eyelids' 
  • I have small eyelid space
  • I have a slight double chin
Some of these were insecurities, but others were things I realised after multiple shameless selfies, and after examining different techniques for my makeup. This means that the contouring techniques for someone with a long face will not be able to be exactly applied to my face. The techniques for someone with large deep set eyes with a lot of eyelid space will need to be adapted. The techniques for someone with sparse brows with a straight shape may not work for my eyebrows.

So I think this is one key thing that people need to know in order to perfect their makeup. No face shape, eye shape, eye size, nose size etc. is better than another, more beautiful than another. BUT it's important to know what yours is and apply your make up accordingly.

Hope this was helpful! LEAVE A COMMENT with your tips & tricks! xx
Thursday, 20 August 2015

QUICKIE: Contour Kits from 2015

So I decided to do a different type of Quickie today. Instead of doing a review of products, I am going to be giving you the long awaited verdicts on my opinions on which contour kit reigns over all others!


I have done in depth reviews and swatches of all these kits so I will firstly list the links for those posts here:

Too Faced Cocoa Contour Kit Review & Swatches

Australis AC ON TOUR Contour Kit (compared with ABH Original Contour Kit) Review & Swatches

Anastasia Beverly Hills Powder Contours (All Shades) Review & Swatches

Kat Von D Shade & Light Contour Kit Review & Swatches

So now, let's get into the results!

I contemplated for a long time how I will do this because there was so much information to condense into, what I wanted to be, a short post. So I decided I will simply have "categories" of winners. I will provide a one sentence justification if necessary (if not, there will be no reason for the winner because it may be self-explanatory).


Best Overall Palette: Kat Von D Shade
& Light Palette. 

It has an excellent formula, caters to various skin tones, blends well, pigmented and sturdy packaging.

Most Versatile Palette: ABH Contour Book or Contour Kits

Although the Original Contour alone is not versatile, the fact that you can pick and choose the colours in your kit makes this one the best for anyone and everyone.

Best for Travel Palette: Kat Von D Shade & Light Contour Kit

It has sturdy packaging with a good sized mirror and is nice and thin.
Easiest to Use Palette: Too Faced Cocoa Contour

This has an easy-to-blend formula and since it is not overly pigmented, it is super quick and easy to use for beginners and everyone else.

Thanks for reading and I hope this helps in your decision making process. If you have any questions, write them below and I'll answer them for you! :) 

I intend to try out more kits - leave the ones that you love below!

Wednesday, 5 August 2015

SPEND OR SAVE?: Australis AC ON TOUR vs Anastasia Contour Kit

HIGH END ITEM: Anastasia Beverly Hills Contour Kit
RRP: $40USD (excl. shipping)

DRUGSTORE ITEM: Australis AC ON TOUR (Unfortunately, unavailable in the U.S.)
RRP: $16.95AUD 

So the next instalment of my "Spend or Save" Series will be to compare the Australis AC ON TOUR with the ABH Contour Kit. I am sad to say that those in the U.S. or the U.K. (the bulk of my readers) will not be able to get their hands on this kit.

However, I have done posts reviewing the Kat Von D Shade and Light Palette (link HERE) and the Too Faced Contour Kit (link HERE). So you can check those out instead. I will be following this post up with an ultimate decision on which kit I think is the best, so keep an eye out for it.
Top: AC ON TOUR Kit
Bottom: ABH Original Contour Kit
Left: AC ON TOUR Kit
Right: ABH Original Contour Kit
As you can see from the pictures, they look almost identical. So I did think this was extremely appropriate for this kind of a post. Keep reading to find out whether I think you should save your pennies and purchase the "drugstore item", or whether you're better of forking out the dollars for the "high-end item".

Wednesday, 22 July 2015

REVIEW & SWATCHES: Too Faced Cocoa Contour

ITEM: Too Faced Cocoa Contour (U.S. Link HERE)
PRICE: $52AUD (Price at MECCA. U.S. Price $40USD)


I snagged this baby on the day that it released in Australia at MECCA Maxima just to make sure that I had my hands on it ASAP and was able to test it out. I have now used it for a few weeks and feel confident in being able to give a good thorough and honest review on it. I know it's been out in the U.S. for a while but I think that it's new enough that not everyone would have purchased it yet.

So read this review to find out my thoughts, and use this to help determine whether or not you should purchase it yourself!

Tuesday, 14 July 2015

REVIEW & SWATCHES: Kat Von D Shade + Light Contour Palette

ITEM: Kat Von D Shade + Light Contour Palette
PRICE: $46USD (U.S. Sephora. For my fellow Aussies, this can only be purchased from Sydney Sephora in Australia for the time being)

Every single company in the beauty industry has come out with a contour palette. But one of the most raved about is the Kat Von D Shade + Light Palette. So this is a review and swatches of this coveted palette.

I will also be doing some comparisons with the Anastasia Beverly Hills Palette and other contour palettes in the future for those that are curious. So remember to follow this blog for more in the future! 


Sunday, 12 July 2015

REVIEW & SWATCHES: Makeup Geek Products

ITEM: Makeup Geek Eyeshadows
PRICE: $5.99USD 

ITEM: Makeup Geek Foiled Eyeshadows
PRICE: $9.99USD 

ITEM: Makeup Geek Blushes
PRICE: $9.99USD 

So I have expanded and grown my Makeup Geek collection recently and I thought that it would be good to share my thoughts and swatches of the product. I will preface by establishing that I have no affiliation with the company, so all my opinions are my own personal opinions that are completely honest and true.


Monday, 29 June 2015

SPEND OR SAVE?: NYX Micro-Brow vs Anastasia Brow Wiz

HIGH END ITEM: Anastasia Beverly Hills Brow Wiz 
RRP: $21USD (excl. shipping)

DRUGSTORE ITEM: NYX Micro-Brow Pencil (U.S. Link and Price HERE)
RRP: $10USD (Price on Ladymoss excl. shipping)


Sorry that I have been completely MIA for a long time! Exams, events and catching up on rest have consumed me. BUT I have and will continue to be active on Instagram no matter what so don't forget to follow me @mnh.beauty (Link is provided).

So to kick start the second half of the year, I am bringing you another SPEND OR SAVE between the immensely popular Anastasia Beverly Hills Brow Wiz and the affordable NYX Micro Brow Pencil.

Sunday, 31 May 2015

REVIEW & SWATCHES: Colourpop Highlighters

ITEM: Colourpop Highlighters
PRICE: $8USD each

Application tips: Fingertips will provide the highest amount of coverage. Brush suggestions: Use a flat synthetic cheek/foundation brush or a duo fibre brush; flat synthetic brush will give more coverage and the duo fibre brush will give a more sheer, air brushed effect. 

Other tips & info: When finished, close that sucker up tight! Don't leave the jar opened for long periods of time; you may lose some of the magic that makes the Super Shock Cheek Pearlised so amazzzing. Colour builds from natural to a more intense look...Build to your heart's desire!
There has been a lot of hype over Colourpop products all over the beauty sphere. Their innovative formulas, standardised (and extremely affordable) pricing, their cute packaging and their collaborations with various Youtubers & beauty gurus inevitably attracts a lot of attention. However, I decided to purchase a bunch of the eye, cheek and lip products to put the products to the test. (I am a sceptic, so I need to see if things are truly worth the hype)! So the first thing I received & decided to do a review on are the highlighters. 

Sunday, 17 May 2015

QUICKIE: Urban Decay Naked Concealer

ITEM: Urban Decay Naked Skin Weightless Complete Coverage Concealer (U.S. link HERE)
RRP: $36AUD (Price at Mecca)


Yet another product that I have been dying to try because of all the hype. This is a very quick and concise summary of the pros & cons of the product. I also provide my overall opinion & rating. 

Monday, 27 April 2015

REVIEW & SWATCHES: Gerard Cosmetics Lipsticks

ITEM: Gerard Cosmetics Lipsticks
RRP: $19USD + shipping (However there are always discount codes available for packages and/or free shipping). 


There is overwhelming social media attention channeled into the Gerard Cosmetics lipsticks and I decided that it would be good to do a review and swatches since I had so many of the colours (both new and old). I don't have every single colour, but I feel that I have enough colours and have tested them out enough to be able to write a meaningful review.

Monday, 13 April 2015

TOP 5: Bronzers

My Top5 Foundations Post and Top5 Nude Lips Post (both links provided) were both very popular, so I have decided to do my next instalment of this series. This one will be my TOP 5 Bronzers.

If you know me, I am obsessed with bronzers. If I could try every bronzer under the sun I would - and I believe that I will venture to do that (I just need unlimited monetary funds). Nonetheless, I have decided to narrow down the ones I have to my top5. I have tried my share of bronzers, but have not tried every single popular one so this list is prone to change over time. However these are my favourites for the time being.

Sunday, 5 April 2015

REVIEW & SWATCHES: Anastasia Beverly Hills Cream Contour Kit

ITEM: Anastasia Beverly Hills Cream Contour Kit
RRP: $40USD

Thanks to the popular demand of my review on the ABH powder contours (link is HERE) and the ABH liquid lipsticks (link is HERE), I found that the Cream Contour Kit was inevitable.

After testing this extremely popular product - the Anastasia Cream Contour Kit, I have decided to do a complete review and swatches of it for everyone. I only purchased the Medium Kit because that is what I thought would be my shade. However, there is also a Light Kit and a Deep Kit. They are also in the process of releasing a Fair Kit but have yet to do so.

For my fellow Aussies out there, this is available on the Anastasia Beverly Hills website (as linked above) - which ships internationally. For others, Macy's also stock this product. If you shop through Ebates (link is here) you can also get cashback on your purchase (making the product even cheaper than through the direct website)!


So now that we have gone through all the logistical things, we will jump straight into the review and swatches! 

Saturday, 4 April 2015

SPEND OR SAVE?: Hourglass Veil Mineral Primer vs NYX Angel Veil Primer

HIGH END ITEM: Hourglass Veil Mineral Primer (U.S. link and price HERE)
RRP: $69 for 30mL (Price at MECCA)

DRUGSTORE ITEM: NYX Angel Veil Primer (U.S. link and price HERE)
RRP: $16USD for 30mL (Price on Beautyjoint excl. shipping)


The second instalment of my Spend or Save series will be comparing the very popular Hourglass Veil Mineral Primer with the affordable NYX Angel Veil Primer. So first of all we will kick off with the Hourglass primer! 

Sunday, 22 March 2015

REVIEW & SWATCHES: Anastasia Beverly Hills Liquid Lipstick

ITEM: Anastasia Beverly Hills Liquid Lipstick
RRP: $20 (USD)


So I bought these beautiful looking Anastasia Liquid Lipsticks because the colours looked absolutely divine and because there was so much hype surrounding it. I was a little reluctant at first because shipping to Australia was $17.95 (U.S.) and the exchange rate was so ridiculous that it converted to an absurdly high amount. But… the more people that posted about them on Youtube, Instagram and Blogs made it impossible for me to resist. Eventually, I took the plunge and decided the shipping was only worth it if I bought a number of them so I bought 8 of them.


Monday, 16 March 2015

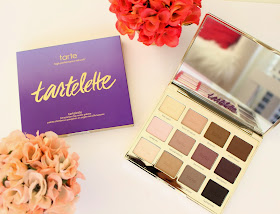
REVIEW & SWATCHES: Tartelette Palette

ITEM: Tarte Tartelette Palette (Aus: Buy at Sydney Sephora. U.S. link HERE)
RRP: $68AUD (Sydney Price) $44USD (U.S. Price)

So there is obviously a lot of hype circulating around this product so... you know I had to go out and get my hands on it. As soon as I saw it in Sephora (Sydney), I grabbed it and was at the register. I have used it a couple of times and feel I can sufficiently review the product now!

Thursday, 12 March 2015

REVIEW & SWATCHES: Anastasia Beverly Hills Powder Contours

ITEM: Anastasia Beverly Hills Contour Book (link) & Kit (link) & Refill (link)
RRP: Book - $150; Kit - $40; Refill - $14 each (all prices are USD)

Claims:
Sculpt and define your features with up to 29 powders designed to contour and highlight.


So I have had the Anastasia Contour Kit for a long time. However, I was dying to get my hands on this Contour Book so... I did! This was something I wanted so that I can provide people with swatches of all the colours whilst also giving my personal review on the product. I have the Original Kit but these are now available with greater flexibility.

For review and swatches of the ABH Cream Contour Kit please CLICK HERE.

Wednesday, 11 March 2015

FAVOURITES: February 2015

So I decided to start a Monthly Favourites blog post to summarise the things that I have been obsessed with. I won't have too much boring detail in it but will quickly summarise why I have been loving it (and as usual, all the links will be provided if you just click the name of the product!)

So...These are a few of my favourite things! *whistles* (I had to. Sound of Music is one of my favourite movies ever!)

Sunday, 1 March 2015

QUICKIE: Hourglass Veil Mineral Primer

ITEM: Hourglass Veil Mineral Primer (U.S. link HERE)
RRP: $25 for 10mL, $69 for 30mL, $96 for 60mL (Sydney Price) 

FOR A POTENTIAL DUPE CLICK THIS LINK HERE

Claims: This lightweight, satin-finish mineral primer melts into the skin, restoring moisture to dehydrated skin whilst minimising shine. It helps to visibly diminish the appearance of large pores and fine lines, and preps the skin for even makeup application while extending its durability so that your makeup stays in place for longer. It is formulated with SPF 15 from naturally-derived Titanium Dioxide and Zinc Oxide to protect skin from UVA/UVB rays. Free from Oils, Fragrance, and Parabens. Water-resistant.

Thursday, 26 February 2015

REVIEW & SWATCHES: Too Faced Soul Mates Blushing Bronzer (LIMITED EDITION)

ITEM: Too Faced Soul Mate Blushing Bronzer (U.S. link HERE)
RRP: $46 (Aust. Price) & $34 (U.S. Price)

Claims: Bronzer and Blush: the power couple of beauty. A duo made in makeup heaven to add warmth, contour and a pop of colour for the radiant look of true love. Soul Mates Blushing Bronzer combines a shimmering, sun-kissed bronze and a brightening pop of blush that can be used separately or blended together for a healthy beautiful glow. Carrie & Big: Light to medium bronzer with slight shimmer combined with the perfect pop of coral blush. Ross & Rachel: Medium to deep bronzer with slight shimmer combined with the perfect pop of pink blush. Gorgeous cominbation of blush and bronzer takes the guesswork out of creating the perfect, all-over, natural-looking finish. It is paraben free, gluten free, and vegan friendly.
When I first saw this product in Myer, I simply thought it was cute and was about to walk away. Since I had time to kill however, I decided to pick it up and just see what it looked like. I then flipped the product over and saw the names of the shades: Ross & Rachel; Carrie & Big. Then I was SOLD. Friends and Sex and the City. My two absolute favourites. How could I resist? So I kept my eye on these and made sure that I got them (before they're gone!)

Tuesday, 17 February 2015

ROUTINE: My Skincare Routine (Part 2)


So this is Part 2 of My Skincare Routine. Part 1 is linked HERE and covers my skin's dramatic journey & my general tips and tricks for everyone. In this instalment, I will tell you about the steps that I take & the specific products I use. Like I said in My Skincare Routine Part 1, I have dry skin but fret not, I will endeavour to include advice and recommendations for oily skin ladies out there!

ROUTINE: My Current Skincare Routine (PART 1)

It was requested for me to do a skincare routine, and I thought it was a great idea since I have come a very long way with my skin. However I realised incorporating everything would be SUCH a long post so I have split it into two! Part 1: My Skin's Journey and the Do's and Don'ts. Part 2: My specific routine and products.

Note: I have dry sensitive skin. However I have made sure to include tips, tricks and recommendations for my oily skinned ladies out there!


I was born with eczema and so I frequently had redness, dry patches, & flakes all over my skin. It was painful, itchy and unpleasant to look at. During high school (year 9-11) it became quite severe and permanent on my face. My forehead, in between my brows and my entire upper lip were always severely red, bumpy, textured and had huge dry patches. This would then cause around my nose area to also become quite red. My ear lobes were often bleeding and dry. Because this was during puberty (such sensitive years), it took a toll on my self-esteem and I became very self-conscious about my skin. I would frequently go to the bathroom just to splash water on my face (which would then bring my skin back to it's normal colour) and then I would moisturise. However within 15minutes my face would be red as a beetroot again. This all was physically painful as well. It stung like crazy and was extremely itchy.

Sunday, 15 February 2015

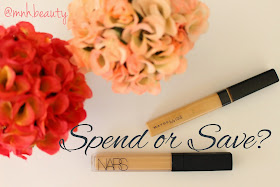
SPEND OR SAVE?: NARS Radiant Creamy Concealer vs Maybelline Fit Me Concealer

HIGH END ITEM: NARS Radiant Creamy Concealer (U.S. link and price HERE)
RRP: $35 (Price at MECCA)

DRUGSTORE ITEM: Maybelline Fit Me Concealer (U.S. link and price HERE)
RRP: $14.95 (Price at Priceline)

I have decided to do another new series: SPEND OR SAVE? I will do comparisons between High-End products and Drugstore products to determine whether or not you should fork out the cash for the High-End product or if you should just save your dough and go for the drugstore product.


So to kick-start the series I decided to compare the NARS Radiant Creamy Concealer and the Maybelline Fit Me Concealer. Since the two are so often compared, I really put it to the test.